Oracle uses Oracle Applications Framework, aka OAF, to build web based pages in Oracle EBS applications. OAF is XML and JAVA based framework. End users or consultants can customize Oracle EBS applications using OAF technology. Following are the types of customizations that end users can do using OAF.
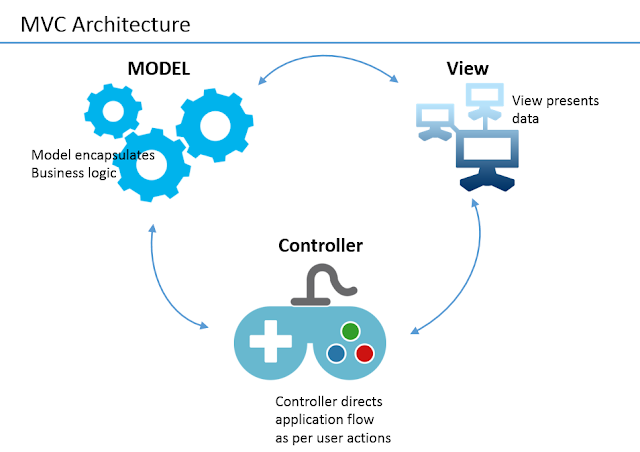
Below is a layered architecture followed by OAF framework which is based on the MVC architecture.
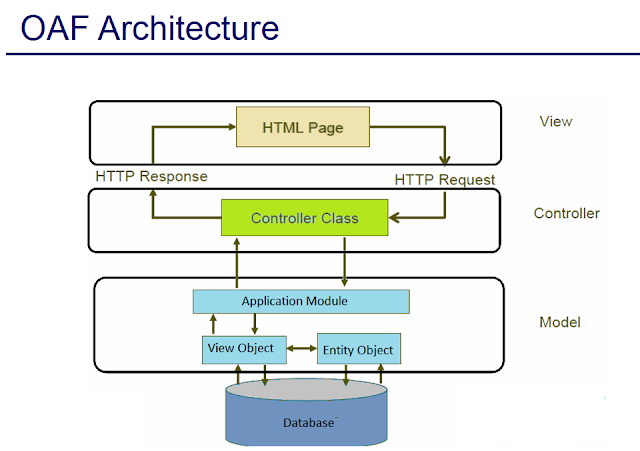
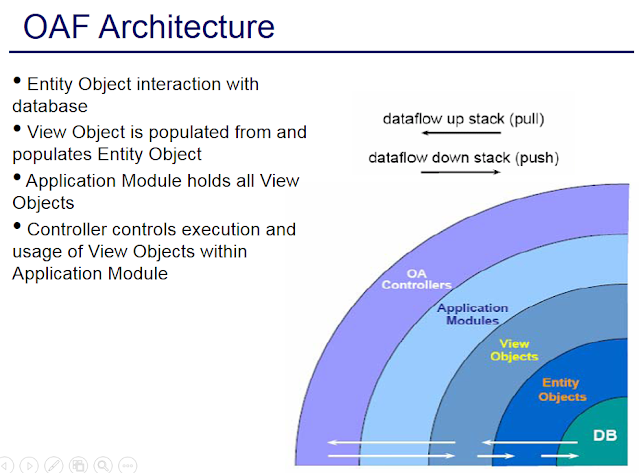
In OAF, code components are majorly classified into view components, BC4J components and controller components. Each database table record that is part of the application is represented by an EO (Entity Object). A list of database table records that are represented by EOs are collected into VO (View Object). AM (Application Module) behaves as a content container within the model layer that holds all the VOs pertaining to a transaction. CO (Controller Object) responds to user actions and talks to AM to fetch data or perform transactions. In OAF UI (User Interface) components are built in XML technology. Below is a simplified representation of OAF, aka Onion structure. This picture is borrowed from Oracle Crop.
- Controller Extension
- BC4J Substitution
- VO Substitution
- AM Substitution
- Enhancements to existing applications like building new pages.

Below is a layered architecture followed by OAF framework which is based on the MVC architecture.

In OAF, code components are majorly classified into view components, BC4J components and controller components. Each database table record that is part of the application is represented by an EO (Entity Object). A list of database table records that are represented by EOs are collected into VO (View Object). AM (Application Module) behaves as a content container within the model layer that holds all the VOs pertaining to a transaction. CO (Controller Object) responds to user actions and talks to AM to fetch data or perform transactions. In OAF UI (User Interface) components are built in XML technology. Below is a simplified representation of OAF, aka Onion structure. This picture is borrowed from Oracle Crop.


